ACH Payment
 Updated
by Tyler MacDonald
Updated
by Tyler MacDonald
If you handle payments with Quickbooks online, you can add the ACH payment type.
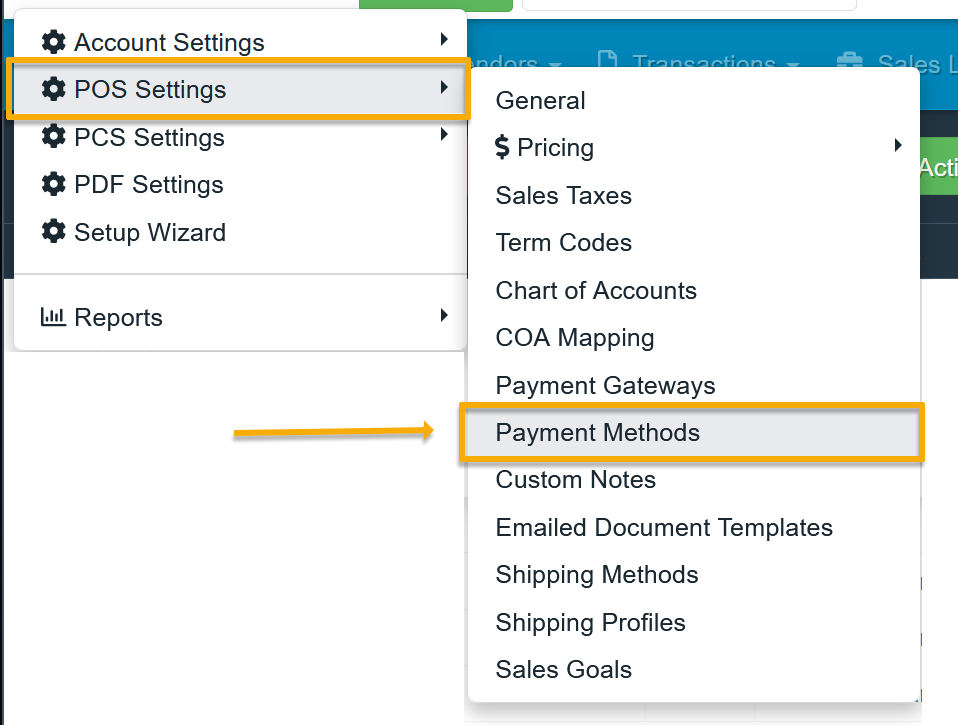
To add this payment type go to POS Settings —-> Payment Methods
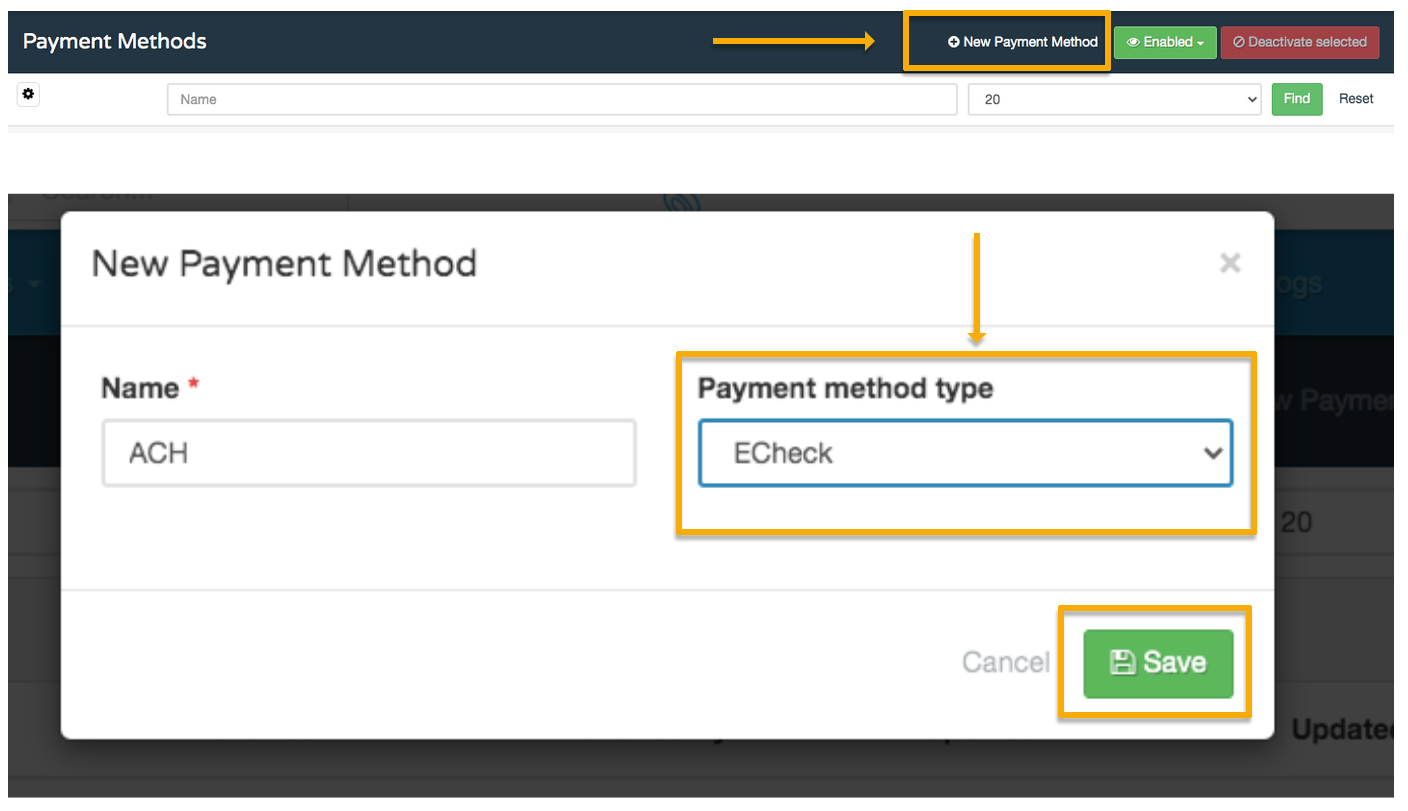
Select +New Payment Method, and then select ECheck from the drop-down menu
Once this has been enabled, Customers would be able to see the link to pay the ACH option as a method of payment
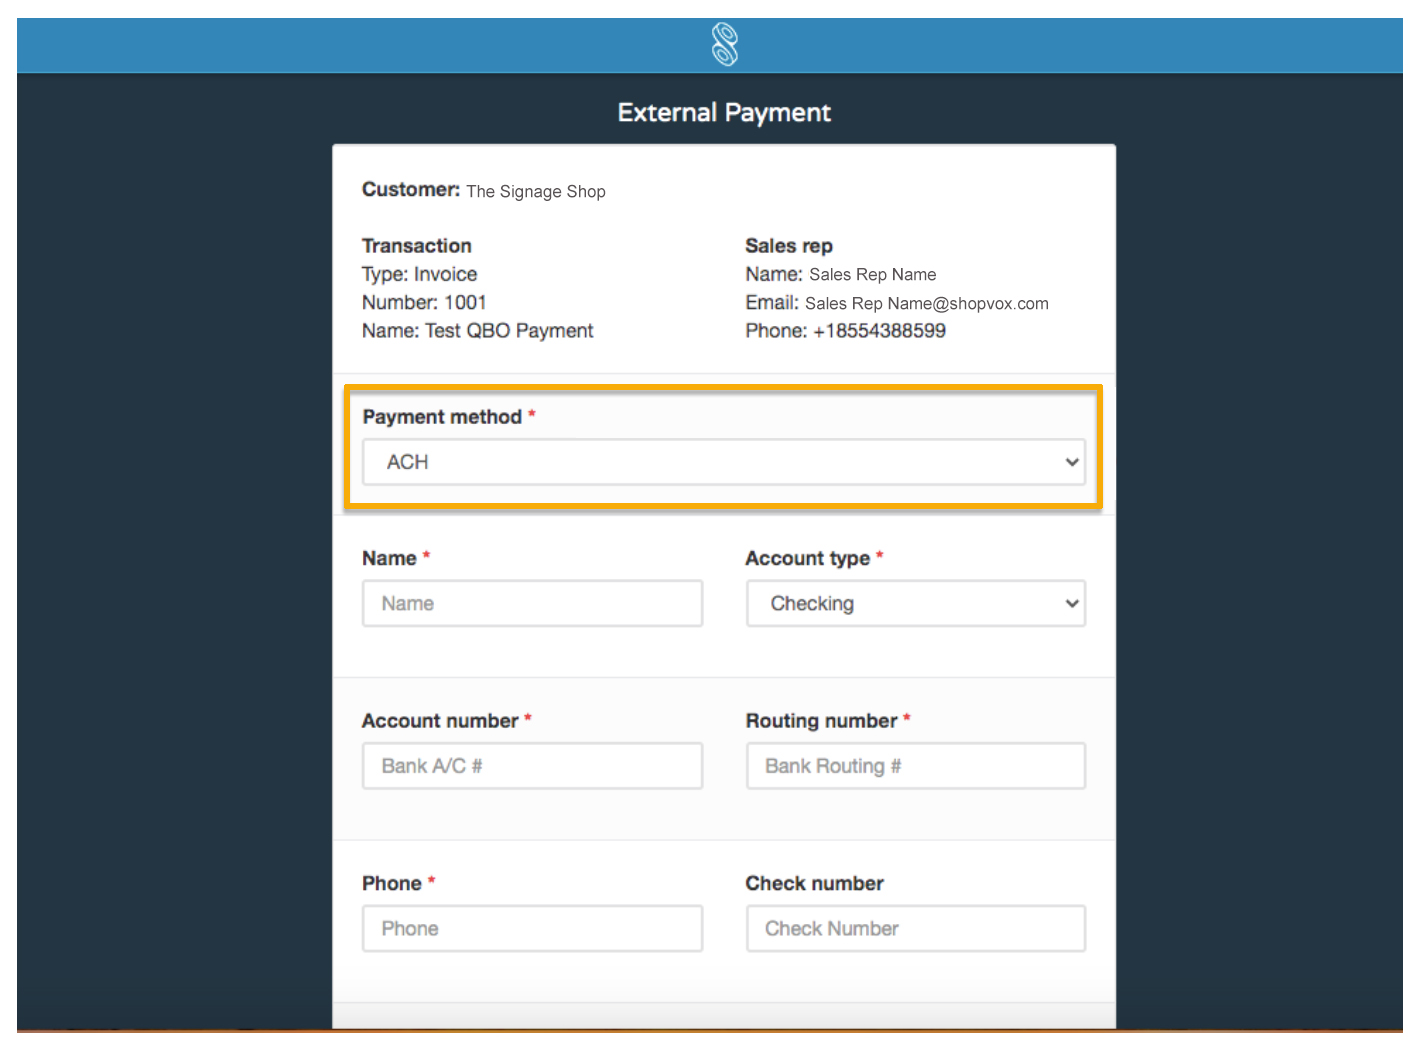
Once the ACH option for payment has been chosen, the Customer can enter bank information (account and routing number).
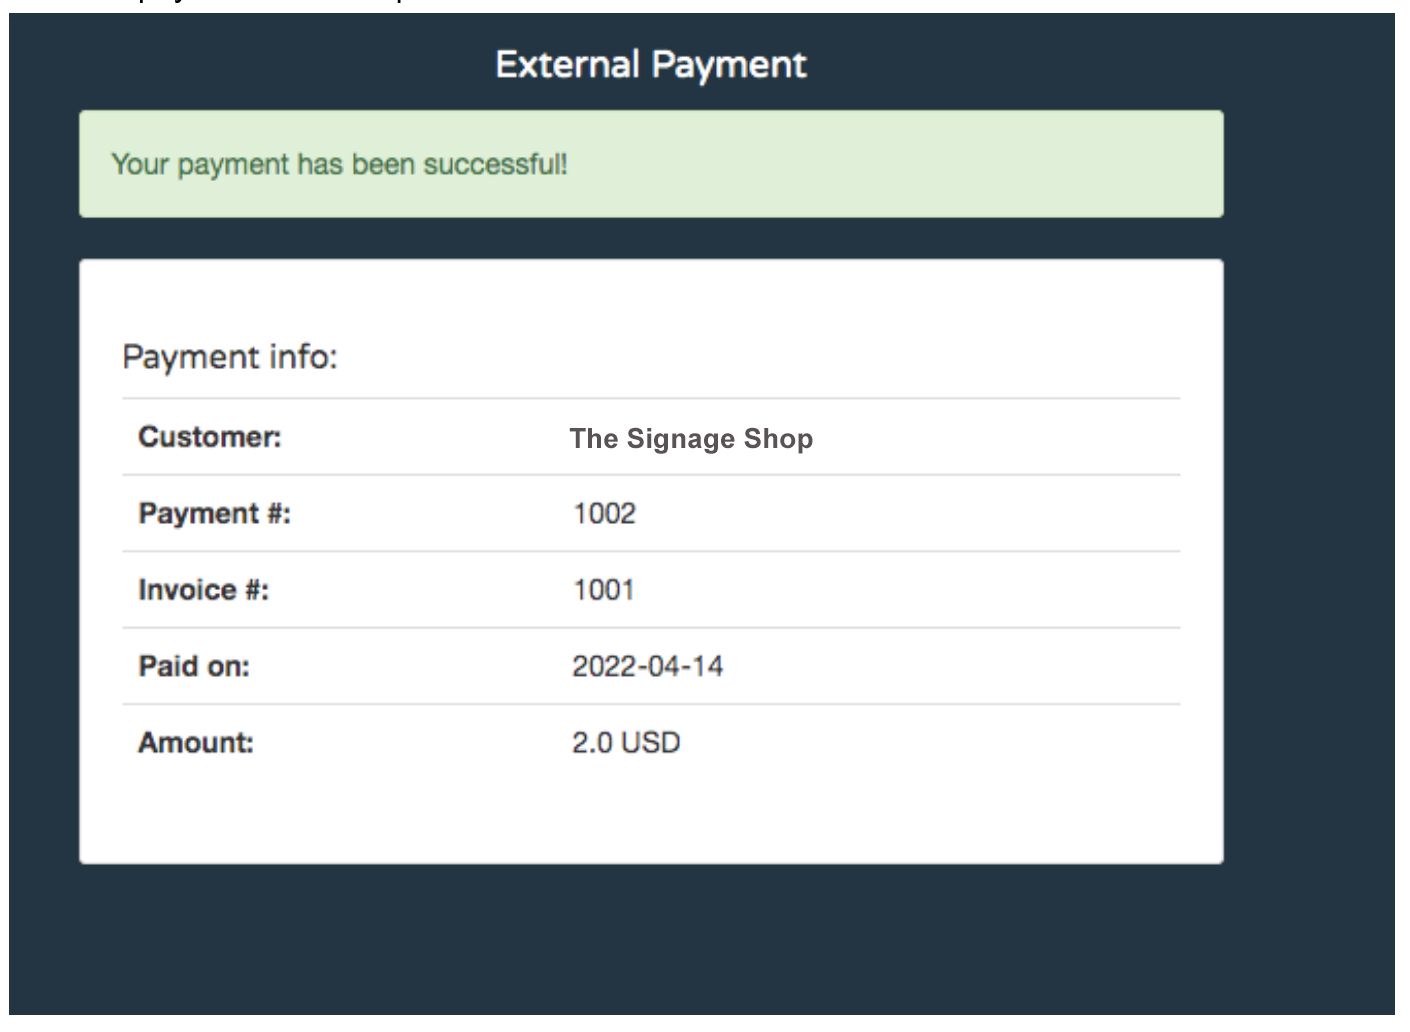
Once payment is processed successfully, a confirmation message will show on the screen stating so and a payment # will be provided.
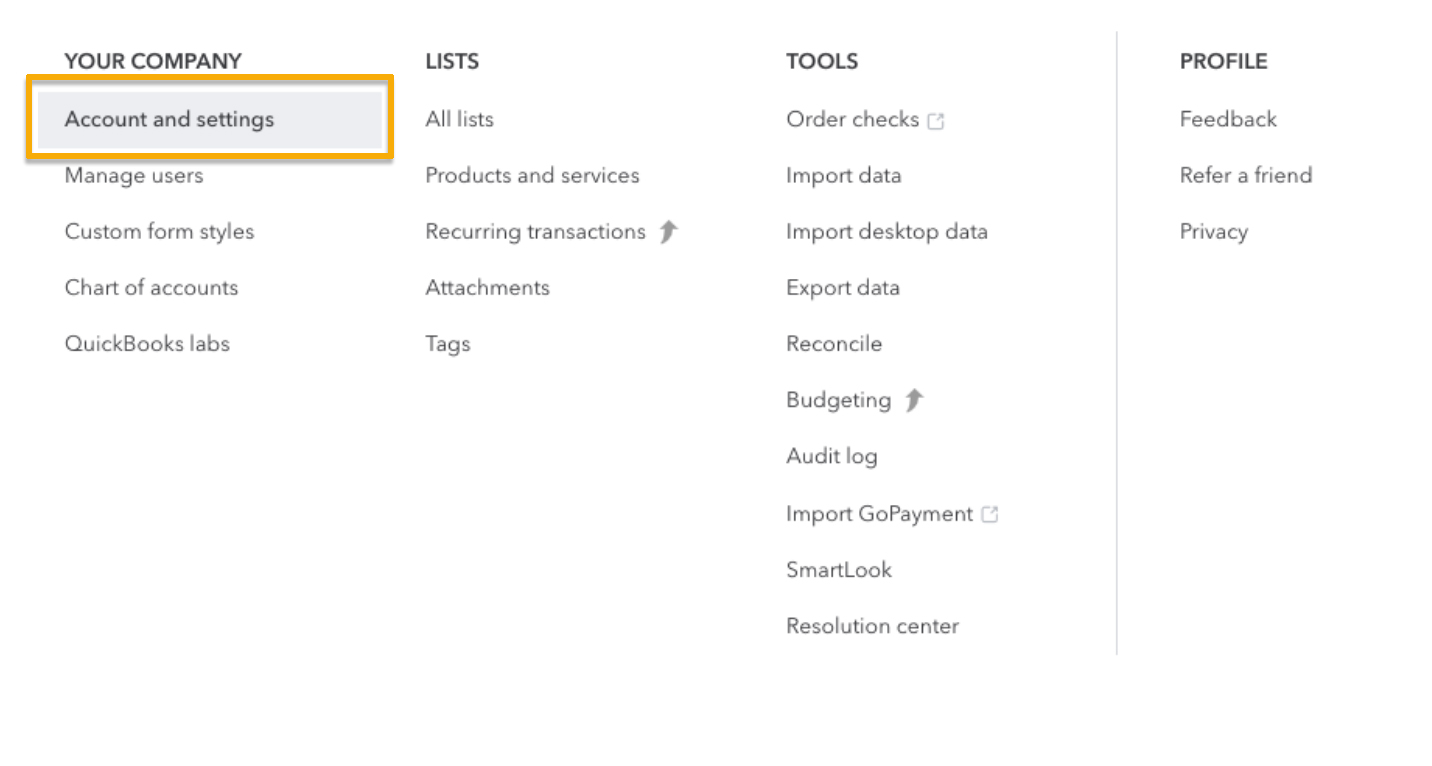
In QuickBooks, select your Account and Settings
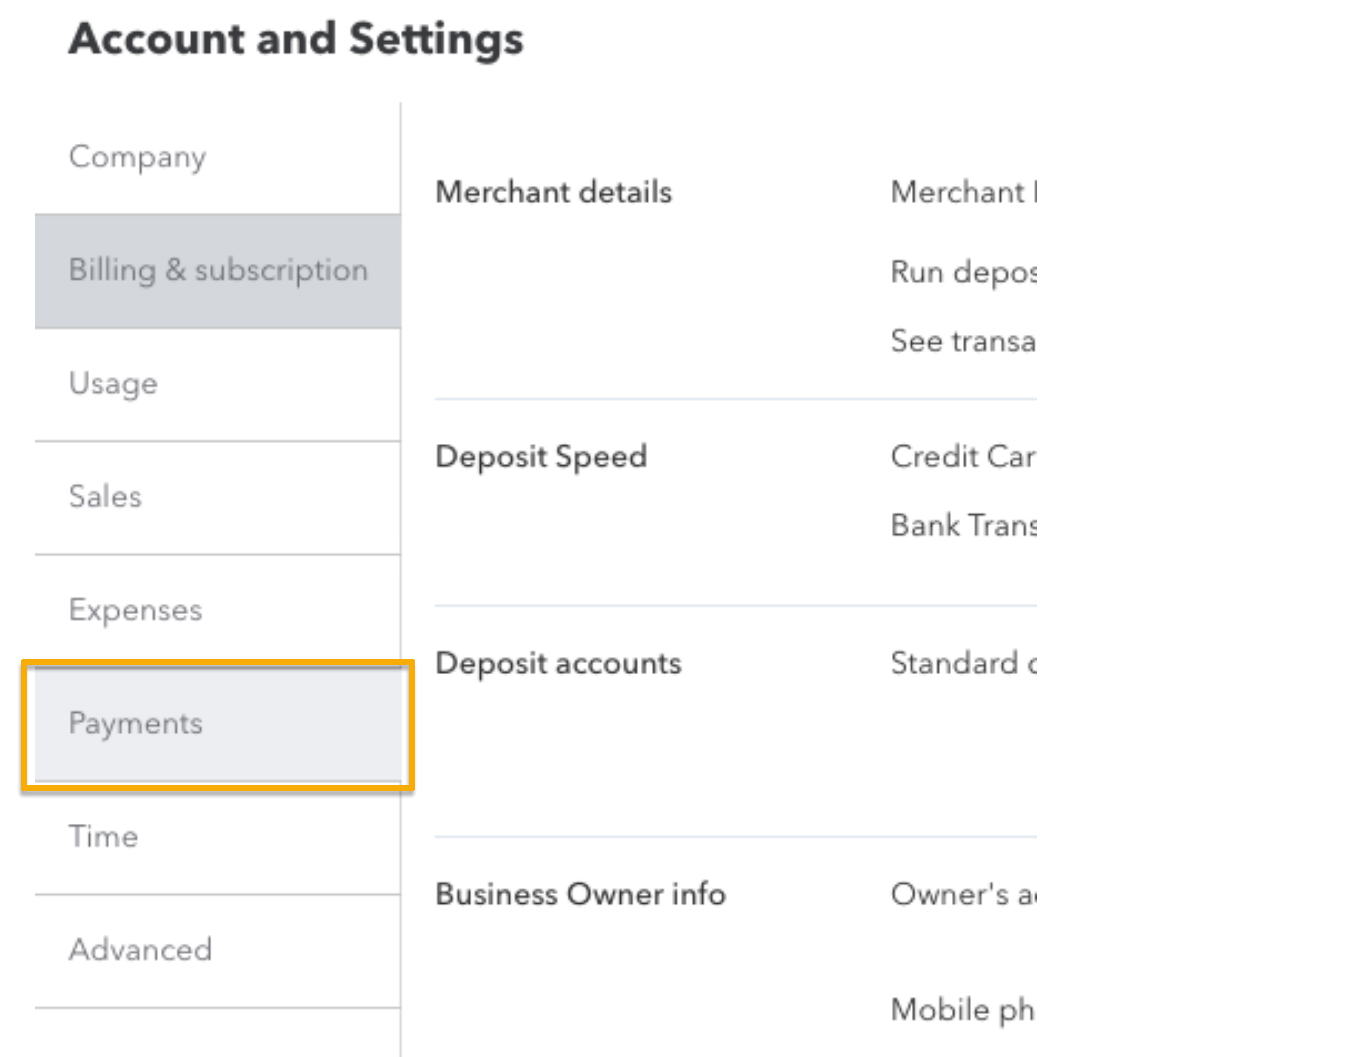
Select: Payments
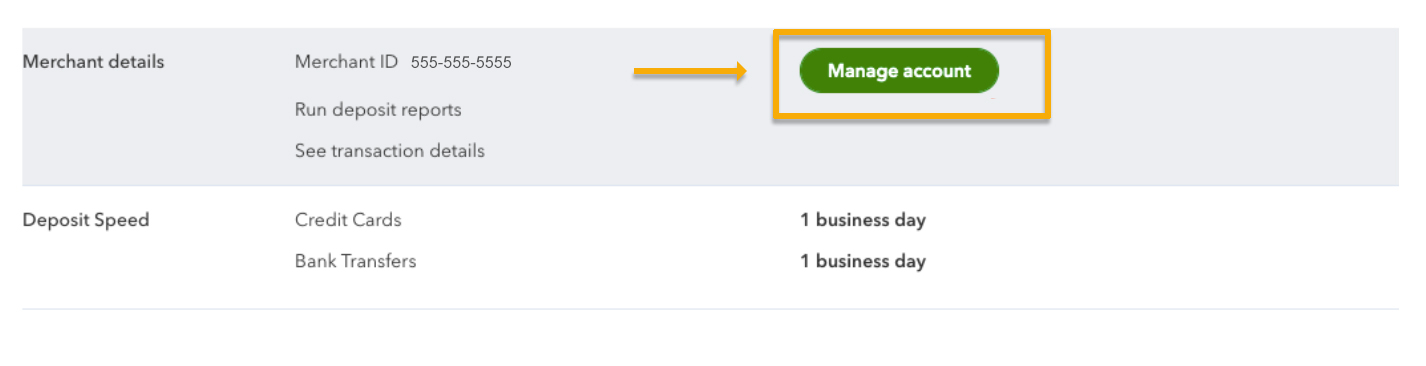
Select: Manage Account
Select: Transactions
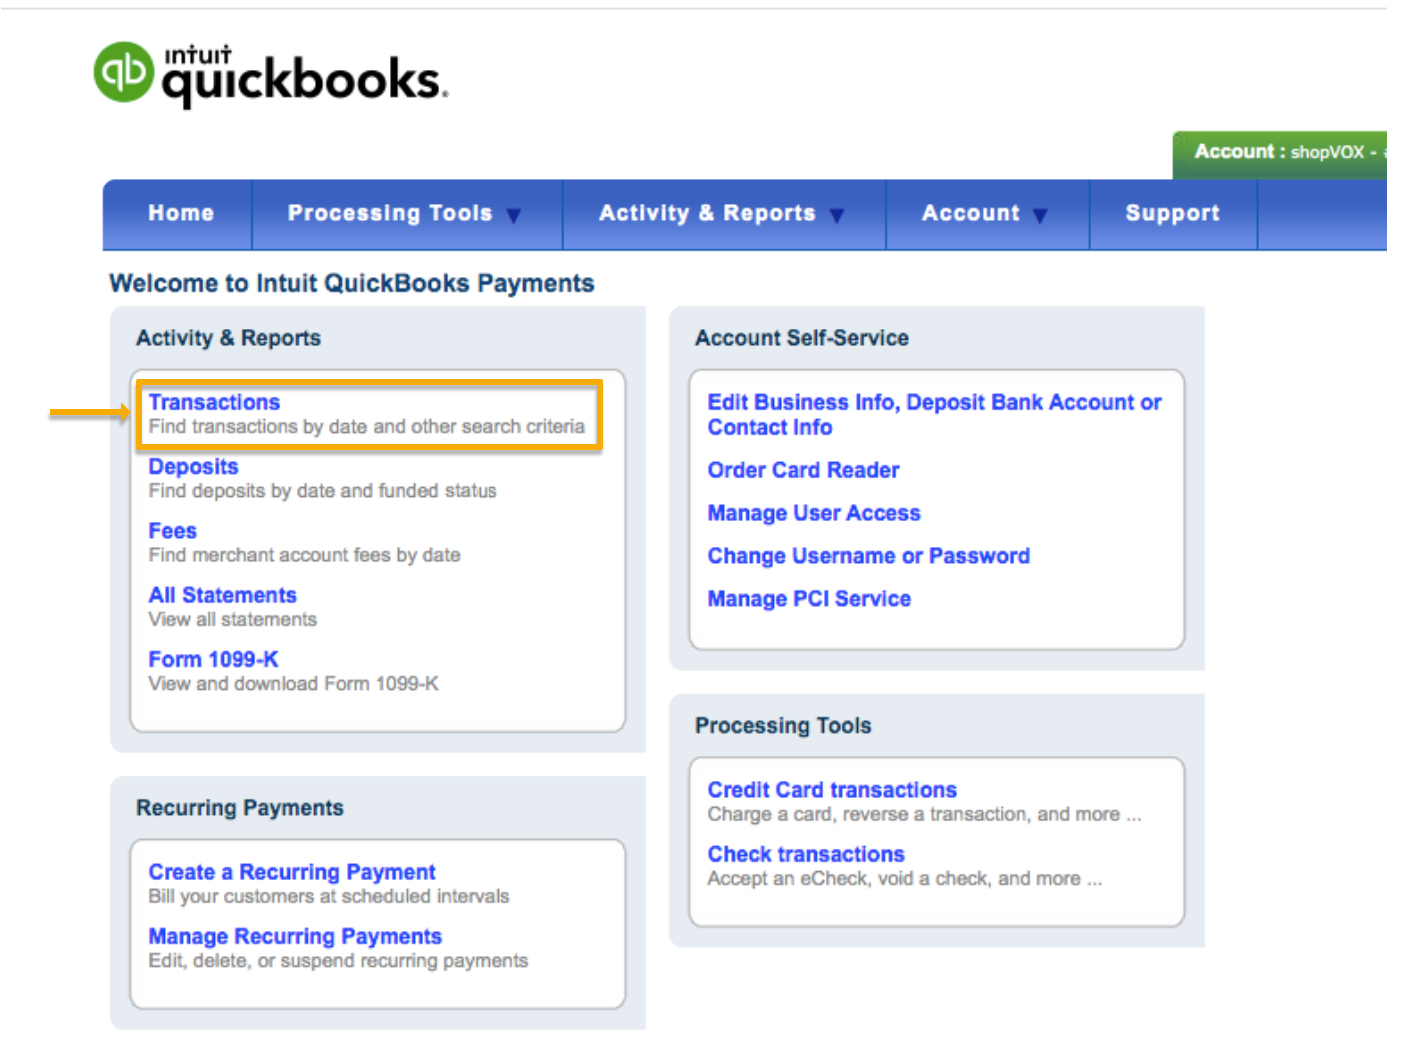
Now you will be able to see the payment
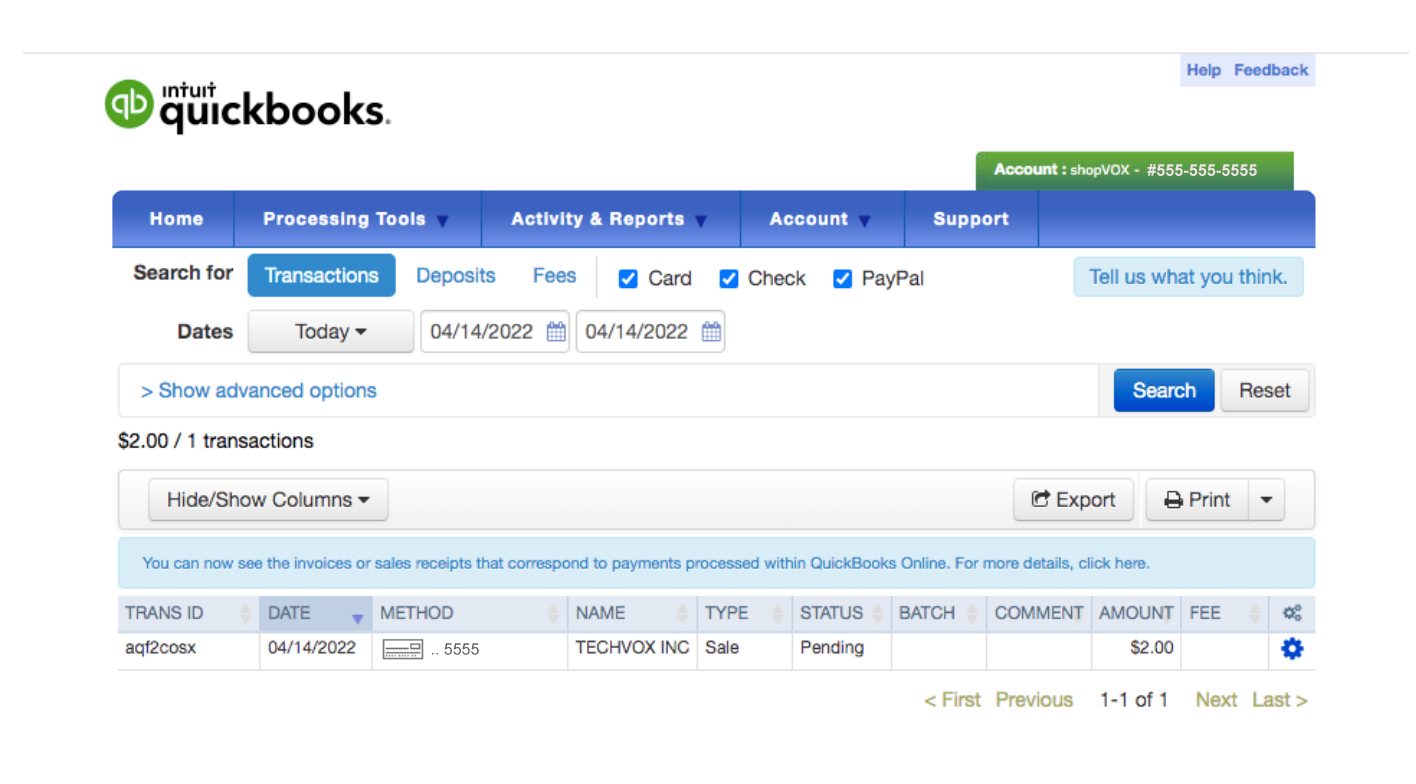
Click the Gear icon for more options
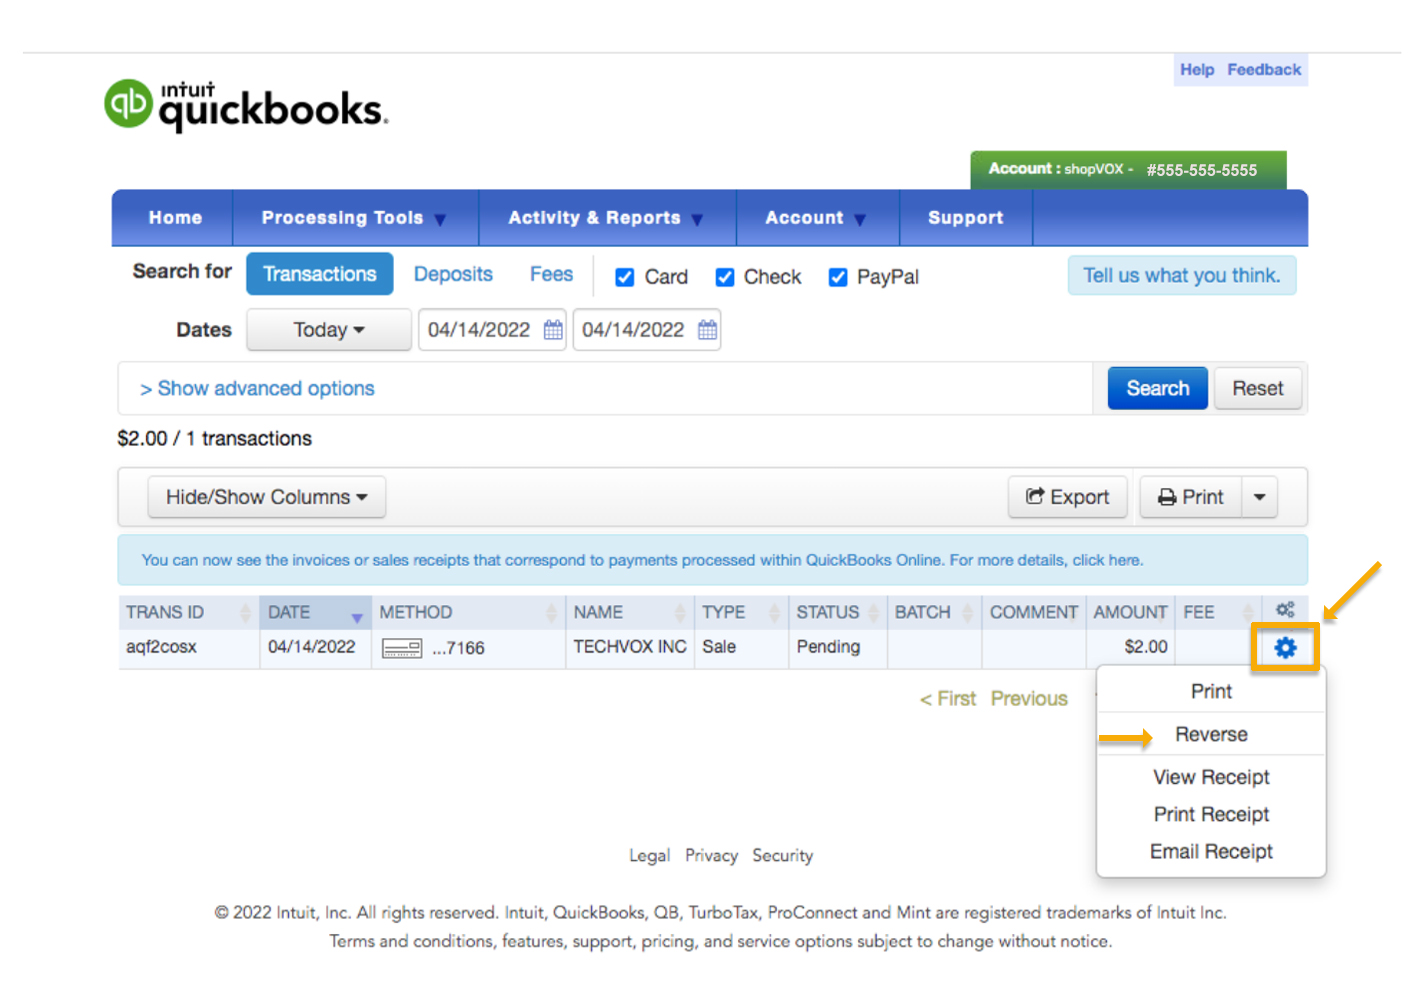
Options
- Reverse (For refunds)
- View Receipt
- Print Receipt
- Email Receipt
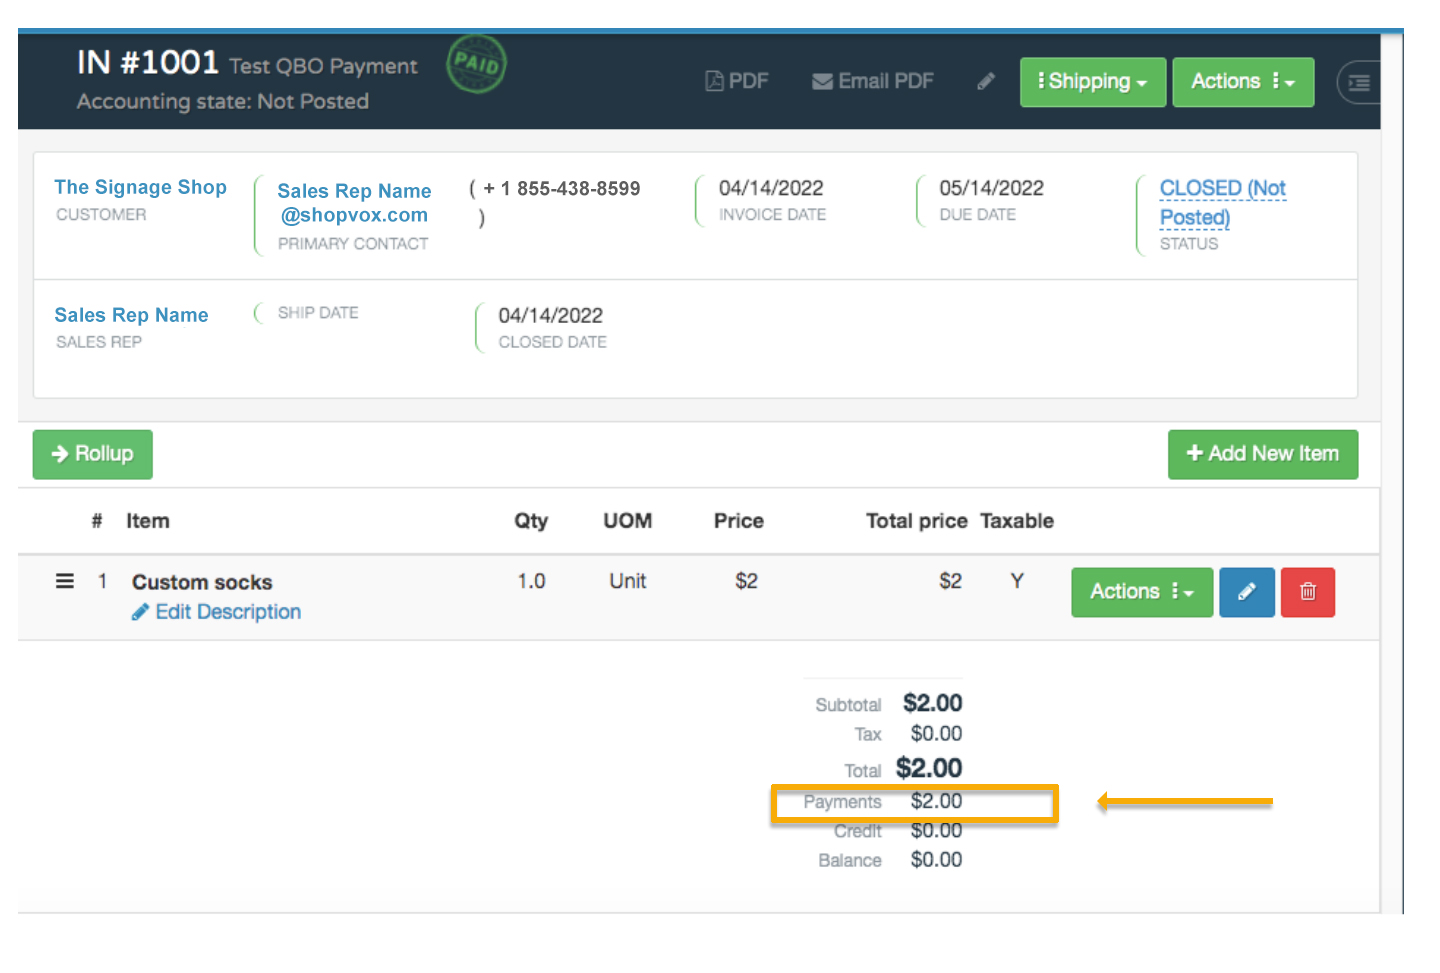
Once an ACH payment is made, it will automatically be applied in shopVOX
