Creating a shipment
Shipping integration is now included with shopVOX Pro.
Before You Can Create A Shipment:
To create a shipment you first need to go to your settings to set up your carrier(s) (Fedex and/or UPS)

And scroll down all the way to the bottom and you will see the settings you need for your shipper (Fedex and/or UPS)
How to use this feature:
Enter all that info and then you can do one of two things.
- Look up rates in Quotes, Sales Orders & Invoices
- Create shipments Invoices only.
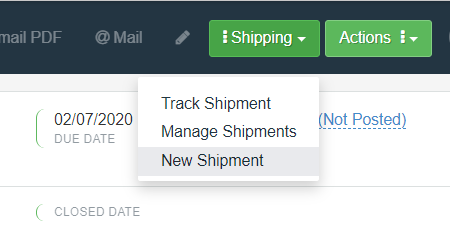
If you need to look up rates with your shipper go to either a Quote/Sales Order or an Invoice and you will see a Shipping button like this, choose if you want to Manage, Create or Track a Shipment.

Once the forms opens up, add the from and to address and also the package details and click on Lookup Rates like below.

The system will find the rates for you and show a list like below, pick one.

Once you choose one you can then create a shipment with this shipping service, by filling out the rest of the data. Once you say Create shipment, there will be a button on the bottom to print the shipping labels like below.

And the labels will print like this sample label.

Where to get the UPS Settings data from?
- UPS Account Number - Get it form your ups.com account. You can get it from ups.com, once you login go to MyUPS > Account Summary
- Access Key - Login to your ups.com account and then go toSupport > Technology Support > UPS Developer Resource Center > UPS Developer Kit > Manage Access Keys. Once here follow the instructions to "Request New Access Key" (the link at the bottom of the screen)The next page will show you your access key, copy that and save it somewhere for future use. For more details on How to do this... click here.
- Username & Password : What ever you use to login to ups.com
Creating a Shipment
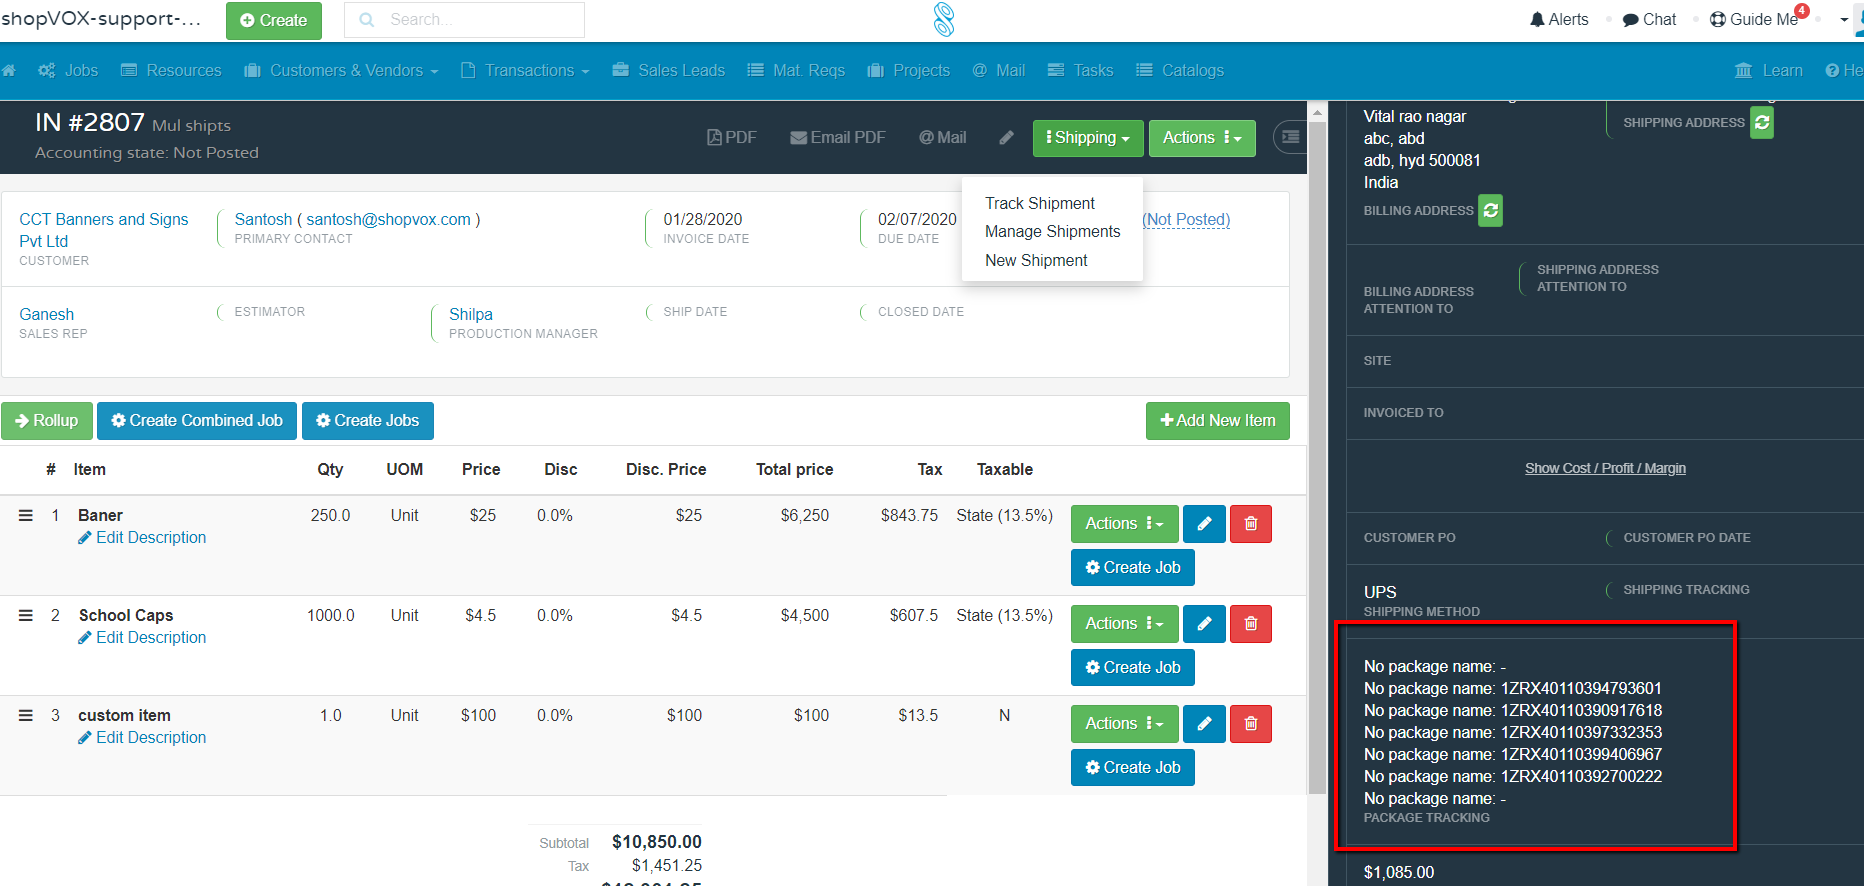
Step 1. Open the desired Quote, Sales Order, or Invoice.
Step 2. In the upper right hand portion of the Quote, click the Shipping Menu, then New Shipment (shown below).
Step 3. From the Shipments page (shown below), click the Create Shipment radio button.

Step 4. Select the Shipper, Account, Payment Type, and Service. Enter the Ship date.
Step 5. The Shop Address will populate automatically with the address for your Shop. The Customer Address will automatically populate with the Customer's Primary Address. To select a different address, select it from the Use Customer Address drop down menu.
Step 6. Enter the Package Length, Width, Height, and Weight. Select the type of Packaging from the Packaging drop down menu. Enter the Reference Info. NOTE: You can also create Shipping Profiles for standard sizes you ship all the time!!
Step 7. Click Create Shipment.
Once created, the Tracking number for the Shipment will show at the bottom of the Shipments page.
Here is a video showing how this works in detail.
Multiple shipments
If you are dividing up an order and shipping it to multiple locations, you can repeat the steps above to create a new label(s). The shipping details and tracking information are located on the right side bar just below the Shipping method chosen.
Here is a short screen cast of how this looks...

